Your Legal Resource
Brinck Baidarka
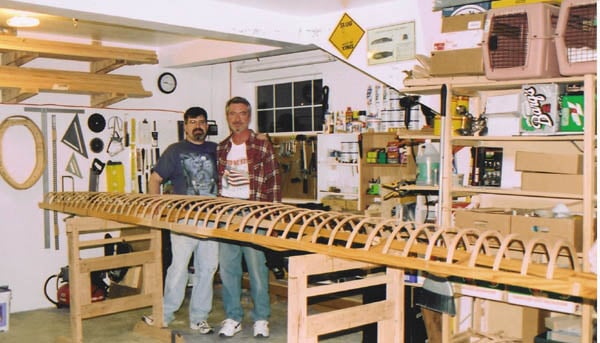
Building the Brinck Baidarka
I am currently building an Aleutian Baidarka, using the instructions found in Wolfgang Brinck's book, 'The Aleutian Kayak'. I have tried to be as close to the methods and techniques that were described in the text. My only major departure ended up being the ribs.
I had originally intended to build a Pygmy Boats Osprey when I saw one for the first time a few years ago. I am now debating between it and an Arctic Tern 14. Exploring the stitch and glue arena led me to Chesapeake Light Craft and Chris Kulczycki's The Kayak Shop as alternatives. (Maybe a CLC LT 16/17 will come out of the shop someday.)
Further study led me to strip build boats and Nick Schade's The Strip-Built Sea Kayak and Ted Moores' Kayakcraft.
Finally, another set of links led to Skin-On-Frame boats, and between space, tools, economic concerns, and cats that own the garage (and thus would be problematic with epoxy), and one look at the Baidarka on the cover of Brinck's book, I knew what I was going to build first.
I started construction sometime in November 2002 between quarters at school and was able to work on it for 3 weeks after work, and on weekends. I managed to get started on it again at the end of May 2003 and make more progress. My Dad came out to visit during June and we were able to dedicate 2 1/2 days to the boat, and really make some progress.
I've continued on it nights and weekends pretty regularly since. The last coat of poly (of 6) went on the canvas on the 24th of August, 2003. Decklines and a cockpit coaming are still needed. But it's floatable.
I live in Bothell, WA (USA), so some recommendations may be specific to the area.
I'm going to try to write the log in the order that events occurred in the shop. I'll back update entries as I learn things to make information easier to find. (For me, as well as you adventurous readers.)
I hope to provide some useful guidance and to repay some of the help I received from huge numbers of people during this process.
The real driving force for the building log, other than the fact that there aren't that many Baidarka logs out there, was that while I found the resources I will mention below are fantastically useful, sometimes I felt the need to have some more detailed information to work from or to be able to have an 'oh, I had that problem, it just happens' reaction, without having to ask a 'dumb' question on a board somewhere.
Preparations
-------------------------------------------------------------------------------------------------
I get kind of 'retentive' about projects and did a LOT of reading before I started, and have continued as the process has moved forwards. I did most of this before I started on the boat itself.
Skin-On-Frame Concepts (specific and general)
-------------------------------------------------------------------------------------------------
Wolfgang Brinck - The Aleutian Kayak
Pretty obviously the primary reference for this project.
Robert Morris - Building Skin-On-Frame Boats
Fantastic book, well written and has a wealth of details buried within.
George Putz - Wood and Canvas Kayak Building
I found this most useful for stepping out of the 'traditional' mindset temporarily, and his commentary is fun. :)
General Kayak Building Resources
-------------------------------------------------------------------------------------------------
The Baidarka Mailing List (The Archives have instructions on joining)
The best resource available to you is after your own brain. And in many cases better... :)
Follow the link to Kayak Building. Found late in the process. Not entirely sure how I missed it, but... Go here regularly and be inspired.
Again, not sure how I missed this one... Fabulous resource.
-------------------------------------------------------------------------------------------------
Tools, Shop Space, and Accessories
-------------------------------------------------------------------------------------------------
I'm working in a fairly large 2 car garage with a 'bump' on one side that has my bench and some storage. A more than adequate space. Would be perfect if it weren't for the vertical support between the parking spots. The only restrictions I have on use are simple ones. My wife expects her work stuff to be covered before I start generating dust, and whenever possible work that requires both stalls of the garage should be finished and cleaned up to allow her to park inside. (Especially when it's cold or rainy). Not unreasonable requests, but you'd be amazed at how hard it is to remember to cover things when you're 'in the zone :)
Based on my current experiences, these are the tools I think you would REALLY need to have to get the job done. Your mileage may vary. All of the authors mentioned above have good lists that are much more detailed than this. The list below is what I would recommend to a person who had no tools whatsoever. (And specifically related to this project. I'd recommend some other tools for general household stuff.)
A Good Knife. I got a Swedish Sloyd Knife from Lee Valley Tools. This is the tool I reach for most often.
Block Plane. Must have. Once I got mine tuned and figured out how to use it, I've been extremely happy. I got a Contractor Grade Stanley for Xmas from Home Depot. Very adjustable, very friendly
Japanese Pull Saw. I got a Marples Fine/Coarse from Home Depot, and I'm never going back. You will have to pay me to make me use a 'traditional' saw again.
Hammer, Rubber Mallet, Wood Mallet. Pick One. :)
Combination Square. All steel. I have an older one that appears to be better than anything I've seen elsewhere.
25' 1" wide Tape Measure.
Chisels. I finally got a set of Marples Blue Chips (Blue handles) from Home Depot. The 4 pack I got has what I have found most useful; 1/4", 1/2", 3/4" and 1".
Powered Drill. Corded or Cordless. I like cordless for convenience and mobility, but I used my corded 3/8" DeWalt to do all of the Rib holes because my cordless would have screamed in pain about halfway through.
Brad Point Drill Bits.
Circular Saw. I'm using an old 6" Porter Cable 345. I would actually recommend a 7 1/4" saw to a new buyer.
Router. Preferably in a router table. I knocked a table together for my Porter-Cable 690 that fits in my Workmate.
Jig Saw. Do you really want to cut out jigs and forms with a coping saw, by hand?
Large Workbench. You could probably live without it, but I wouldn't want to try. Mine is 2' x 8', made out of 4" x 4"s, 2" x 4"s, and an 8' sheet of 3/4" plywood ripped lengthwise for top and a bottom shelf. Very similar to the one Ted Moores describes in Kayakcraft.
Workmate or Equivalent. Couldn't live without this. I recommend the one with the WOOD top, not the new plastic one.
Leather Gloves. For working with steamed wood. If you use Willow, you probably won't need these. Some people do their bending bare-handed...I'm a wuss, gloves for me, thanks.
Clamps. Spring, C, and Quick-Clamp 'bar' clamps.
I also have, and used the rest of my small stable of power tools.
My DeWalt DW708 Sliding Double Bevel Miter Saw was used for scarfs and Deck Beams, and some other bits and bobs.
The fixed sander (1" belt/8" disk) was really handy for cleaning up and tuning ribs and deck beams.
The DeWalt DW??? Random Orbital Sander was invaluable for cleaning up and easing edges on parts.
For your sanity, calibrate your tools before you begin, and as you buy new ones. I found, while working on supporting projects, that an inch on the cheap square I bought was not an inch on either my combination square or my Tape Measure. Makes it hard to be consistent. I also discovered to my dismay that my Stanley 3/4" chisel is 3/32" too small. Not a big deal if you are using it to trim edges or something, but when you are trying to make mortises consistent?...
Kayak Horses
-------------------------------------------------------------------------------------------------
Most people call them saw horses. I have sawhorses, I use them for holding wood when I cut them. (So wouldn't that make them wood horses? Anyway...). I use these for holding my kayak when I build it, thus...
I scavenged ideas from a couple of places (including Schade and Kulzuzcki). It was an interesting exercise in woodworking to get warmed up, so they are hideously over-engineered (mortise and tenon, glue, and screws). Had the thought (which I didn't follow through on) to make the center supports removable to make the horses portable for shows, symposia, or something. (And just to do it.)(but didn't) They aren't exactly fine furniture, but they work well. I've even used them as infeed and outfeed supports for long stock with my 'table saw'.
I did the suspension straps with the same 1" nylon strapping I suspend the kayak with. The first time, I just used blocks. The second time I used 4" drywall screws wrapped in duct tape as the 'pivots'.
I have since seen some folding horses (probably in Morris) that would make a lot more sense for transportable horses. I also saw some really slick PVC tubing horses at R2K3.
Steam Bending
-------------------------------------------------------------------------------------------------
This step TERRIFIED me for some reason. I spent a lot of time upfront trying to figure out how it all worked. I'm glad I did, but some things just have to be figured out the hard way...(see Ribs, below for related comments)
I built a steam box out of 3/4" plywood, similar to that recommended by Lee Valley Tools. It's 4 feet long, and can handle about 45" stock (design flaw related to the inset door). It's powered by an Electric Kettle I got from Lee Valley. I ended up building an extension for the steam box to handle longer stock 5'-6' (for the cockpit coaming). I think the better answer is a more 'ad-hoc' PVC tube for long stock, and a shorter (3') steam box for ribs.
Using a tip I picked up from somewhere, I added a length of Flexible PVC tubing with a funnel (made from a lawnmower fuel filter) by drilling a hole in the steam spout. This lets me add water with the kettle running. Adding water is an art form. Adding water reduces the temperature, and adding too much will cause it to boil over. Too little and the kettle shuts off. I really wish I could find a kettle that lets you add water on the fly, with a viewport to check the water level.
Turns out the tip is from a Fine Woodworking article on Steam Bending.
Steam bending is easier than you might think, but here are some things that I had to find out the hard way.
Place the Steambox at a height you can get to the wood from BELOW. Steam rises and skin is soft and burnable... I started on my bench, went to the floor, then to my sawhorses.
Make sure the steam box is warmed up before you place wood in and start bending. When you place the wood into the steamer, place it on your top shelf (if you have levels)
The box should be as close to 212(F) as possible during the process. Use a thermometer, don't guess. I was able to find a metal thermometer that goes to 240 at my local grocery store.
Morris's book is worth the money just for the information on steam bending and diagnosing failures, much less the boats.
Buy good material. It may be possible to bend around dowels for ribs (I couldn't, but other people have, and I didn't machine my ribs, I bought them). Home Depot sells a 'hardwood' dowel that is not possible to bend. Make sure you know what you are getting.
Dave, the machinist at work, suggested setting up a glass tube (like a mess hall coffee pot) to check the water level in the steam kettle. I'll have to try this.
Sharpening
-------------------------------------------------------------------------------------------------
What can I say about sharpening... Figure it out before you do too much, your work will be safer and look better if you know how to (and actually do) sharpen your edged tools. I spent some time upfront 'tuning' some hand-me-down planes and some new chisels. The first continuous 4 foot curl I got off of the plane was a really neat feeling.
I can personally recommend the Water Pond water stone set from Lee Valley. I started on using the Mike Dunbar 'Scary Sharp' sandpaper system, but it just wasn't working for me. I switched to the water stones and a new set of jigs and everything started to work.
I use a 325x Diamond Stone for rough work (and would like a 200x Water stone), then switch to an 800x water stone, then a 4000x water stone.
I strongly recommend Leonard Lee's 'The Complete Guide to Sharpening'. A fabulous book, well written and full of more information than you should ever need.
Circular Saw - 'Table Saw'
-------------------------------------------------------------------------------------------------
I don't own a table saw yet (Will probably get a bandsaw instead), but needed to be able to rip long stock to width. I created a jig for it so I can use it as a pass-through 'table saw' to rip long pieces (like gunwales, hull stringers, deck stringers, ribs, etc...) using my Workmate as a stand.
Amusingly, I went with this setup because setting the saw up as a table saw wouldn't have been possible because there isn't a trigger-lock on the saw. The same problem applies to this jig, so I zip-tied the trigger down and wired up an outlet with a switch.
Building
-------------------------------------------------------------------------------------------------
Most of the materials for this boat were purchased at local home improvement stores. The only exception to this was the White Oak I finally used for the cockpit coaming, which I got at a hardwood specialty store (Hardwoods Supply). Lowes was the best supplier overall (compared to Home Depot and Dunn Lumber) as far as selection, quality, and price. The gunwales, keelson, deck stringers, and the stock the hull stringers were ripped from, were C & better Fir. The Deck beams and bow and stern spreaders were stud grade 2x stock. Ribs are Red Oak.
Gunwales
-------------------------------------------------------------------------------------------------
+ I picked the best material I could in 1" x 6" x 8' stock and ripped it to width (1 3/4") using the 'table saw'.
+ I used the Miter box and a jig to put the scarf on all 4 pieces, used my doweling jig to drill peg holes then epoxied.
+ I would strongly recommend you suspend your newly scarfed gunwales between your sawhorses to check for flexibility. The gunwales should arc to the same depth, etc. Mine didn't and it has affected the lines of the boat just a touch. (I don't know how badly until I'm done and I put it on the water.)
+ Use a 'real' (either a woodblock or commercial steel) Depth Stop for Drill Bit when drilling your rib holes! I used tape as a marker because I was lazy and my holes were of inconsistent depth. Be sure you want round ribs at this point though. 'Porting' them to rectangular mortises after the fact is a pain. Additionally, make sure you are accurate about hole locations. Take your time and do it right. If you have a drill press... use it.
+ I put the angles on spreaders, and I think they should be beveled a touch to match the angle of the gunwales as they bend. This would make them easier to keep the spreaders in place.
+ Keeping spreaders locked in was a challenge. I tried Spanish windlasses, but they ended up having to be worked around. I think Morris has the right idea with his setup.
+ I measured the gunwale angles from the diagram in the book to be about 12 degrees. No idea if this is right or not, but that's what I used. My gunwales, deck beams, or sawhorses were out during assembly as my gunwales sit at slightly different angles (13.5 and 16 or so...)
+ The bow spreader should be in 1 3/4" from the end according to a posting to the Baidarka Mailing List (and Wolfgang's response)
+ As I started working on the ribs, I was demonstrating the 'strength' of the frame to my wife by pressing down on a deck beam, and one of the gunwale glue seams completely failed.
With some patient advice from the Baidarka mailing list, I cleaned and reglued the failed joint, and sistered on some oak supports on either side of the gunwale. General consensus seems to be that I over-clamped the joint and squeezed out all of the epoxies.
Bow and Stern Spreaders
-------------------------------------------------------------------------------------------------
+ The book doesn't show it well, but the inside of the Stern spreader
should be rounded
+ Rounding the underside of the spreaders probably is necessary for the behaviors desired in the boat. I took a shortcut and made them with hard angles with my miter saw.
+ The book doesn't show this well but remember to taper the ends of gunwales after installing a stern spreader.
Deck Beams
-------------------------------------------------------------------------------------------------
+ I used my Miter saw to cut angles and to cut the inner and outer cuts as well. I transferred the angles with an adjustable bevel.
+ Lashing was relatively straightforward. I used Hemp Twine and beeswax (both available at Michaels' Craft Stores)
+ Once I finished these, the deck was varnished with Man'O'War Spar Varnish
Bow Piece
-------------------------------------------------------------------------------------------------
+ I made the upper bow piece out of the same fir stock I make the gunwales, etc.. out of. I used some Spruce 3" x 3" for the supporting blocks.
+ I strongly recommend getting the shape of the Horizontal and vertical edges before attaching the vertical to the horizontal. Much easier on the knuckles.
+ Tweaking the excess off of the supporting blocks knocked a couple of ounces off this piece
Hull Stringers
+ I milled some 3/8" by 3/8" x 8' stock (16 ea.) out of a 1" x 8" x 8', I tapered a scarf about 12" deep on each piece with my plane and then epoxied the joints. Once the epoxy was cured, I ran the pieces through my router table with a round-over bit to ease the corners.
+ I'm not sure if I should lash the seams on these. Given current experiences, I probably should. (But I didn't.)
+ I made an insert for the 'Table Saw' to hold the stock down to allow me to cut the undersized strips.
Cockpit Coaming
-------------------------------------------------------------------------------------------------
+ This step took a few tries. The form was created out of 2 layers of 3/4" plywood with the center cut out. Remember, jigsaw users, curves tend to toe out, remember to clean up your cuts.
+ the First try was a piece of 1" x 2" Red Oak stock for Lowes. I milled it down to 1/2" (actual) on the router table, steamed it for half an hour, and bent it. No major problems, some surface cracking around the sharpest part of the form. the Biggest problem was it was about 12" too short.
+ Second try was similar, except I had problems milling the stock, and when I bent it, the surface cracks were more pronounced.
+ The final answer was a visit to Hardwoods Supply in Redmond where they hooked me up with some 1/8" x 1 1/2" x 8' White Oak 1/8". This was so flexible that it practically bent around the form dry. 7-10 minutes of steam and it was like working with butter. I estimated the lengths, tapered the seams with the plane, and bent each layer on top of the other. I used my existing clamps, if the jig were a bit narrower I could have used my spring clamps.
+ I used epoxy with Cab-O-Sil and Wood Flour for the glue. Remember to put down plastic wrap, etc., and keep some white vinegar around for cleanup. I used the precalibrated cup-in-cup method to measure the epoxy. The spring clamps came in really useful here. Brinck implies that you can simply lash these layers together. I'd be curious to talk to someone who had actually done it. After using Gorilla Glue, that might be a way to go as well...
+ After everything was cured, some judicious knife work (as a scraper) was done to clean the piece up, and the ROS was used to sand it down and ease the 3 edges. I finished the sanding by hand and then drilled the holes around the whole of the piece.
Deck Stringers
-------------------------------------------------------------------------------------------------
+ These were cut to length and had both ends near the cockpit notched and tapered while I was waiting on the cockpit to cure.
Ribs
-------------------------------------------------------------------------------------------------
+ Dad helped a huge amount. Having a second set of eyes and extra hands was invaluable.
+ In general, this is a pain in the bejeepers. It's not a big deal now that I have it figured out, but it's still a pain. I think it's just because it's so time-consuming.
+ We switched from round ribs to rectangular ribs after snapping around 25 store-bought Red Oak 3/8" dowels. Got a first-time go with some 1/4" x 3/4" Red Oak ribs, and never looked back. At least till we had to re-mortise every single rib hole (46 ribs == 92 mortises). Dad took one side of the boat, I got the other.
+ Stanley vs. Marples chisels... The Stanleys are out of spec. Most of Dad's mortises were too narrow, which meant each rib had to be tweaked.
+ Thinned ribs to make the sharp curves near the bow and stern easier. This really helped. Replacement ribs when I started to rework were milled 1/32 - 1/16 under vs. 1/32 over, which is what we worked with originally.
+ Once we figured out the technique things went pretty quickly. This really is a step you have to do to get the methodologies.
What helped for us:
Reusable jig.
Hand bending does work if you estimate lengths
+ Came back the next weekend and redid 10 -15 ribs, 5 new, moved others forwards/backward
+ removed bow 4 to fit the keelson bow and rebent after it was fitted.
+ remember to ease the edges of the ribs BEFORE you bend and install them.
Keelson Tail
-------------------------------------------------------------------------------------------------
+ I rough cut and finished this pieces in some idle time first, along with the deck stringers and keelson center.
+ I shaped the 'drop leaf' joint and attached it to the ribs.
Tail Piece
-------------------------------------------------------------------------------------------------
+ I rough cut and finished these pieces in some idle time first, once the keelson tail was in place, I trimmed it. The height estimate in the book would have been a few inches off if I had followed it. Hmmm...
+ Instead of using the circle for a hole, I had some fun. I don't think it will reduce the structural integrity, and it dropped a few ounces.
Keelson Bow
-------------------------------------------------------------------------------------------------
+ Need Carving tools
+ Oscillating spindle sander
+ Easier to do with boat available instead of ahead of time
Keelson Center
-------------------------------------------------------------------------------------------------
+ Flexes right into place
Lashing the Hull Stringers and Keelson
-------------------------------------------------------------------------------------------------
+ Tape your joints to protect from the cord. I used medical tape on the second joint of my pinky because that was the 'pull-point' when I was tightening.
+ I lashed the keelson in place in the bow and stern first. Then I did the first 6 or 8 ribs in the bow because the narrow sections there was a pain.
+ I cut and lashed all of the lines on one end to the rib above the top deck stringer before I started moving around the boat.
I used almost 2 rolls of Artificial Sinew
Lashing the Deck Stringers
+ Remember to notch the deck stringer.
Installing the Cockpit
-------------------------------------------------------------------------------------------------
+ The cockpit needs to be notched front and back to accept the deck stringers.
+ Pay attention if you predrill your lashing holes as I did. You need to make sure you have a lashing point centered front and rear for the deck stringers.
+ Installed Cockpit
+ Coaming Stanchions
The Finished Frame
-------------------------------------------------------------------------------------------------
+ Unvarnished, but complete. Need to double-check footrest locations and backrest locations again before I apply the final coats of varnish.
+ Also need to figure out my deck line strategy.
Varnishing the Frame
-------------------------------------------------------------------------------------------------
+ Used up all of the Man-O-War, and had to switch to Minwax Helmsman Spar Varnish. Slight color difference. The Man-O-War was much more amber. + I used a pair of 2 x 4s to support the boat on the 'horses while varnishing. Need to make some supports to hold the boat when I start skinning.
+ Ended up with 3 coats, one for the major frame members, inside of the ribs, etc. Then two small coats for the outside of the ribs and deck stringers.
+ I think the best advice I can give here is some I wish I had listened to myself about. Ignore Brink, and Varnish as many pieces as components, BEFORE you assemble the darn boat. Getting to some of the crevices, knowing there were sections that weren't being varnished, etc was frustrating.
+ I weighed the varnished frame on 14 Jul 2003. It came in between 28.5 and 29 lbs.
+ At some point in this process the subject of floatation came up. I'll add a new area for Kayak Accessories and put the instructions on making Floatation Bags there. There are instructions in Cunningham's book, and in the June 2002 issue of Sea Kayaker magazine.
Some Pics of the Frame, varnished, etc...
Skinning the Kayak
-------------------------------------------------------------------------------------------------
+ Skinning the kayak was harder and easier than I thought it would be.
+ I ended up using 6 yards of 60" #10 cotton duck from Seattle Fabrics. I saw a number on one of the boards that quoted 14oz a yard (not sure how wide) as the weight of #10. Seems about right.
+ I'm glad I did the 60", it meant that I didn't have a diagonal patch fore and aft of the cockpit. It was enough of a pain to do anyway that I wouldn't have wanted to deal with that as well.
+ Much heavier than I thought it would be. Ended up adding about 6 pounds to the boat. 35 lbs. skinned.
+ Sewing the bow was a real pain. I would do it differently next time. I like the look of the separated upper and lower bow, but I introduced a lot of ripples, etc. upfront.
+ The stern doesn't seem to have the distinctive curve that I've seen on some other baidarkas. I'm not sure what you would do to make that shape.
+ I sewed the 'shoelace' loops and started to tighten the hull with them. I managed to pull one through the canvas. Just as Brinck warns about. I got frustrated and with my wife's help, we stapled the hull to the gunwales. This got the hull nice and tight. I would recommend getting canvas pliers for this process. I didn't have any and wish I did.
+ I used unwaxed white dental floss, doubled for strength, to do the sewing. I think that I might try something slightly heavier next time, possibly squid line.
+ I wonder how #12 cotton duck would work, both weight-wise and strength-wise.
Sealing the Skin
-------------------------------------------------------------------------------------------------
+ I suspended the kayak from the hanging points that I use to store it, with an 'H' with a second crossbar made of scrap wood. I had to run a line from the attachment points to some loops around the bow, and use a set of support sticks to keep things level since the kayak is so bow-heavy.
+ I ended up snagging what might be the wrong product, which I'm a little worried about durability-wise. I ended up using an "Interior Only" product, Minwax Water Based Polycrylic, Satin. We'll see how it holds up in the long run.
+ I used an initial coat, thinned 50/50. It soaked in really well. Hopefully, it actually carried some of the solids in with the water. It was amazing to see the skin tighten as it was wetted. I was worried about soaking at least one coat all the way through the skin to protect it from rot/mildew. After some searching on the boards, it seems like the consensus as to whether it matters or not is split 50/50. If this works, cool. If not, I'll slosh some bleach water around.
+ The color difference was pretty interesting as well.
+ I quit after 5 full-strength coats every 2 hours since I had gone into the second gallon. I used a 3" straight brush for each coat. Only a small about of drips, and only when I rushed. The only really ugly spot was where the strings were on the bow and I covered them with poly and had to peel them out after it dried. I did this every 2 coats, but it left some 'scarring'.
+ It took about 48 hours for everything to finish drying up, but it would probably have been fine after 24.
+ Still need to attach the cockpit coaming and the deck lines.
The First Sea Trial
-------------------------------------------------------------------------------------------------
+ On 29 Aug 2003 Val and I went to Martha Lake, just outside of Mill Creek, and dipped the Baidarka for its first trial. A light breeze off the water, essentially no waves.
+ The darn thing actually floats.
+ I'm more than a bit wobbly in it. The foot brace is a bit far out. I may have mismeasured. If I get my knees in the correct position, I end up with the bones of my ankles on a rib. We'll get it figured out...
+ I'm going to need to add a back pad, which I had planned on, but forgotten about, and figure out another outfitting. I expected to sit a little bit more snugly in the boat.
+ Skin seems to be sealed, need to make a sprayskirt or a tulilik. Lots of drips into the cockpit, and I scooped up some water trying to figure out the limits of secondary stability, but no apparent leaks.
+ The paddle I made seems to work OK, but the loom was too narrow for my current habits. I'll have to learn to use it eventually. The paddle also seems to be too short overall. I'm going to need to make a second one.
+ Weighed the boat after coming back and letting it dry overnight. 45 lbs. Ouch...
Sea Trial 2
-------------------------------------------------------------------------------------------------
+ 30 Aug 2003
+ About the same as the first day, weather-wise, a little more wind off the water.
+ Tried adding some towels for hip pads, and a backrest. Much better feel to the boat. How much outfitting should a skin boat have? Found the neoprene booties that I actually measured for, and can now hit the footrest.
+ Paddle felt much better, realized that I was gripping right in the center of the shoulders, so just a little wider. on the next paddle.
+ Counterclockwise around the lake.
+ Met a gentleman who was just getting the Pygmy Coho he and his son built as a Senior project on my way out. Met a couple who just moved out here from Chicago and their 9-year-old Retriever who was just learning to swim on my way in. :)
Sea Trial 3
-------------------------------------------------------------------------------------------------
+ 31 Aug 2003
+ About the same as the first day, weather-wise.
+ Removed the towels that were sitting at the coaming level and the backrest. Probably the perfect setup for the boat.
+ Great comments overheard as I went by:
By a couple of 10-year-old boys on the swimming dock: "What's he using as a paddle, a stick?!"
By a son to his father in an aluminum fishing boat as I was 'working out and trying to sprint. "Man, Dad, that boat can really move..."
+ Clockwise around the lake.
+ Met a couple of 4-month-old black labs, and a sick 8-month-old Golden with a degenerative muscular disorder that might need to be put down. :(
Sea Trial 4
-------------------------------------------------------------------------------------------------
+ 01 Sep 2003
+ A lot more wind. According to the 'flag rule' gusts were up around 15-20 mph. I felt a bit wobbly at some times, and really feel like the boat was weathercocking a bit. Could be a skill-level thing. (Probably)
+ I wonder if I'm not sitting quite centered. I also really feel some stress in my hip flexors when I try to keep my knees up against the knee brace. It seems that my right leg is more comfortable than the other, hmmm...
+ Counterclockwise around the lake.
+ Paddle actually had some dry spots on it for most of the paddle. Getting better...
Storing the Kayak
-------------------------------------------------------------------------------------------------
+ Some simple eye bolts in the ceiling of the garage and some cargo straps. The challenge is keeping the frame under the garage door. Fortunately, I have a short car (Saturn), not an SUV.
Cost Summary
-------------------------------------------------------------------------------------------------
+ Leaving out the costs of rib failures and cockpit failures, here is my tracking log of expenses.
Tool purchases aren't included because, well, they're infrastructure improvements, and thus capital expenses, and not project expenses :). (Doesn't work for my wife, but I've got to try...)
[ For Build pics and more information ]